Support
Email setup in classic Outlook
Step-by-step setup for desktop Outlook versions that have FILE, HOME and SEND/RECEIVE tabs on the top ribbon. The same flow as Outlook 2013 applies to versions 2016, 2019 and 2021. Screenshots show the Turkish interface.
Have these ready
All the values you will use during setup are below. Replace yourdomain.com with your own domain name; the username is always your full email address, not just the "name" part.
Want the values filled in for your own address?
The step-by-step email setup wizard asks for your email app and address, then guides you through every screen with settings tailored to your address. We never ask for your password.
Classic Outlook account setup
Automatic setup often guesses the wrong server for corporate addresses; we choose manual setup from the start.
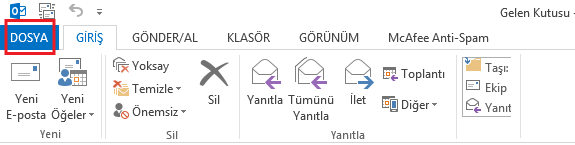
Open the FILE tab
With Outlook open, click the FILE tab at the top left.
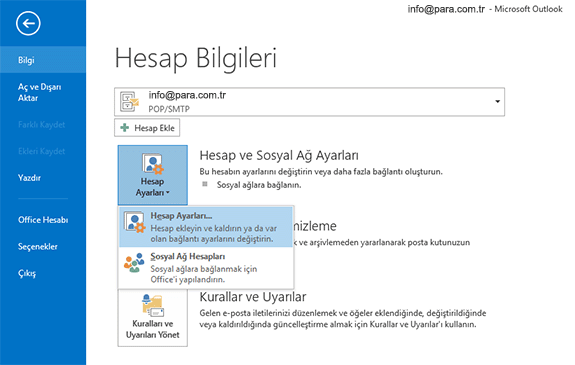
Go to the Account Settings screen
On the Account Information screen that opens, click the Account Settings button, then the Account Settings... row again.
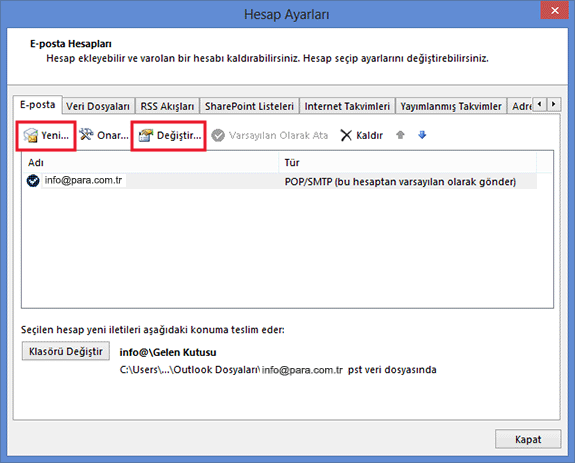
Add a new account
While on the Email tab, press the New... button. If you are going to edit an existing account, you can select it from the list and click Change....
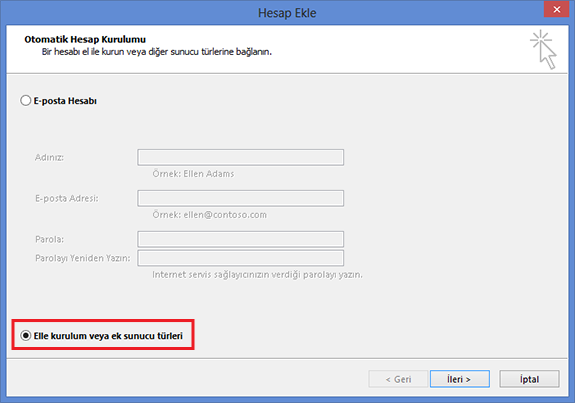
Choose manual setup
Automatic setup tries to guess the server details and is often wrong. At the bottom, select Manual setup or additional server types and press Next.
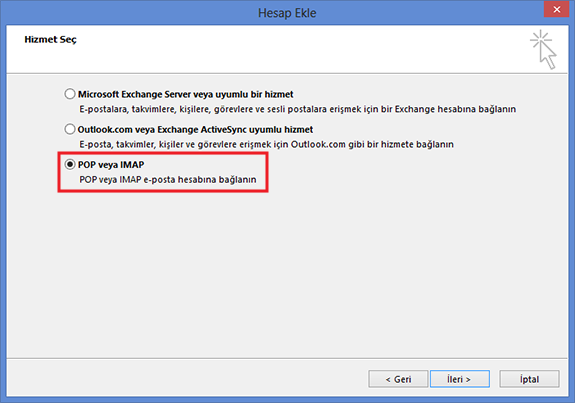
Select POP or IMAP
From the service list, select POP or IMAP and press Next.
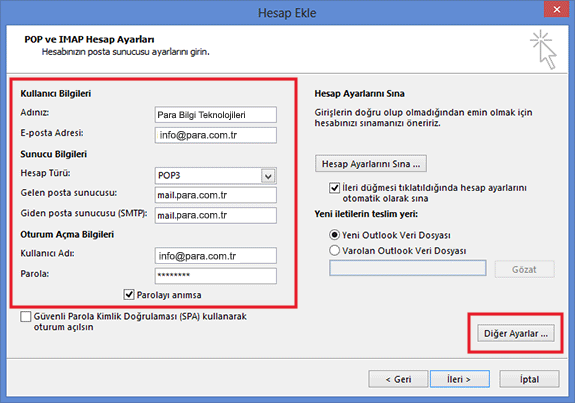
Fill in the account details
This screen is the heart of the setup. In the User Name field, type your full email address, not the short name. After filling it in, press the More Settings... button at the bottom right.
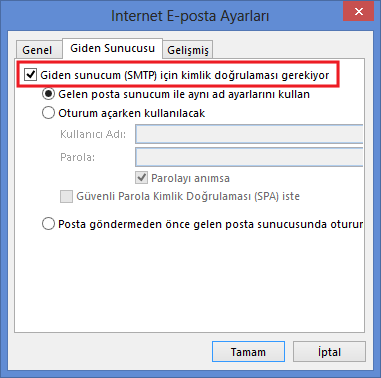
Turn on outgoing server authentication
In the window that opens, switch to the Outgoing Server tab. Tick My outgoing server (SMTP) requires authentication and select Use same settings as my incoming mail server below it.
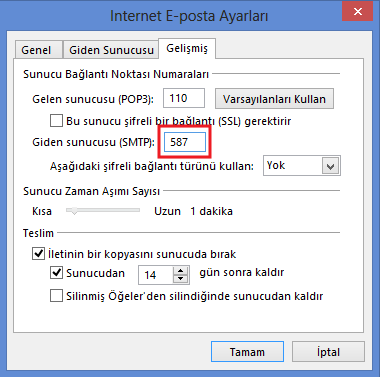
Enter the port numbers and encryption
In the same window, switch to the Advanced tab. First choose the encrypted connection type; if the port number does not change by itself, correct it manually. When done, press OK, then Next.
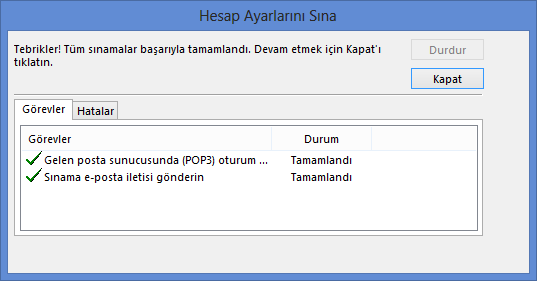
Run the test
Outlook first sends and receives a test message. If both rows say Completed, exit by clicking Close and Finish.
Frequently asked questions
Why does automatic setup not work?
I receive mail but cannot send
Test Account Settings gives an error
Should I choose IMAP or POP3?
I use POP3 and mail is deleted from the server
The mail I sent does not show on my other devices
What should I do if port 587 is blocked?
Setting up in another program?
The server details are the same in all of them; only the look of the screens changes.
New Outlook / Outlook 365
Outlook 365 and the new Outlook app
iPhone and iPad
iOS and iPadOS Mail app
Android
Android phones and tablets
Apple Mail
The Mail app on Mac
Mozilla Thunderbird
Windows, Mac and Linux
Did you get stuck during setup?
- Phone: +90 (312) 417 81 70, weekdays during office hours
- Contact form: fill in the form and tell us which step you are at
- Server details: the table on the Support page